
Key Takeaway : First WiFi project with ATtension commands. Generally ESP-01 comes with default ESP8266 AT firmware which has complete TCP/IP stack. This firmware takes care of DHCP as well.AT commands are used to control GSM phone or Modem.
How ESP-01 gets IP address ? ESP-01 firmware is set by default as DHCP(Dynamic Host Configuration Protocol) client. It broadcasts the DHCP Discover message after power-on . You may refer to following link to understand this process.

If you observe the traffic using FREE Wireshark tool,You will notice ARP from ESP8266 to itself immediately after getting IP address. It is followed by Gratuitous ARP which has both source & destination IPs are same. This is a good method to check IP conflicts.
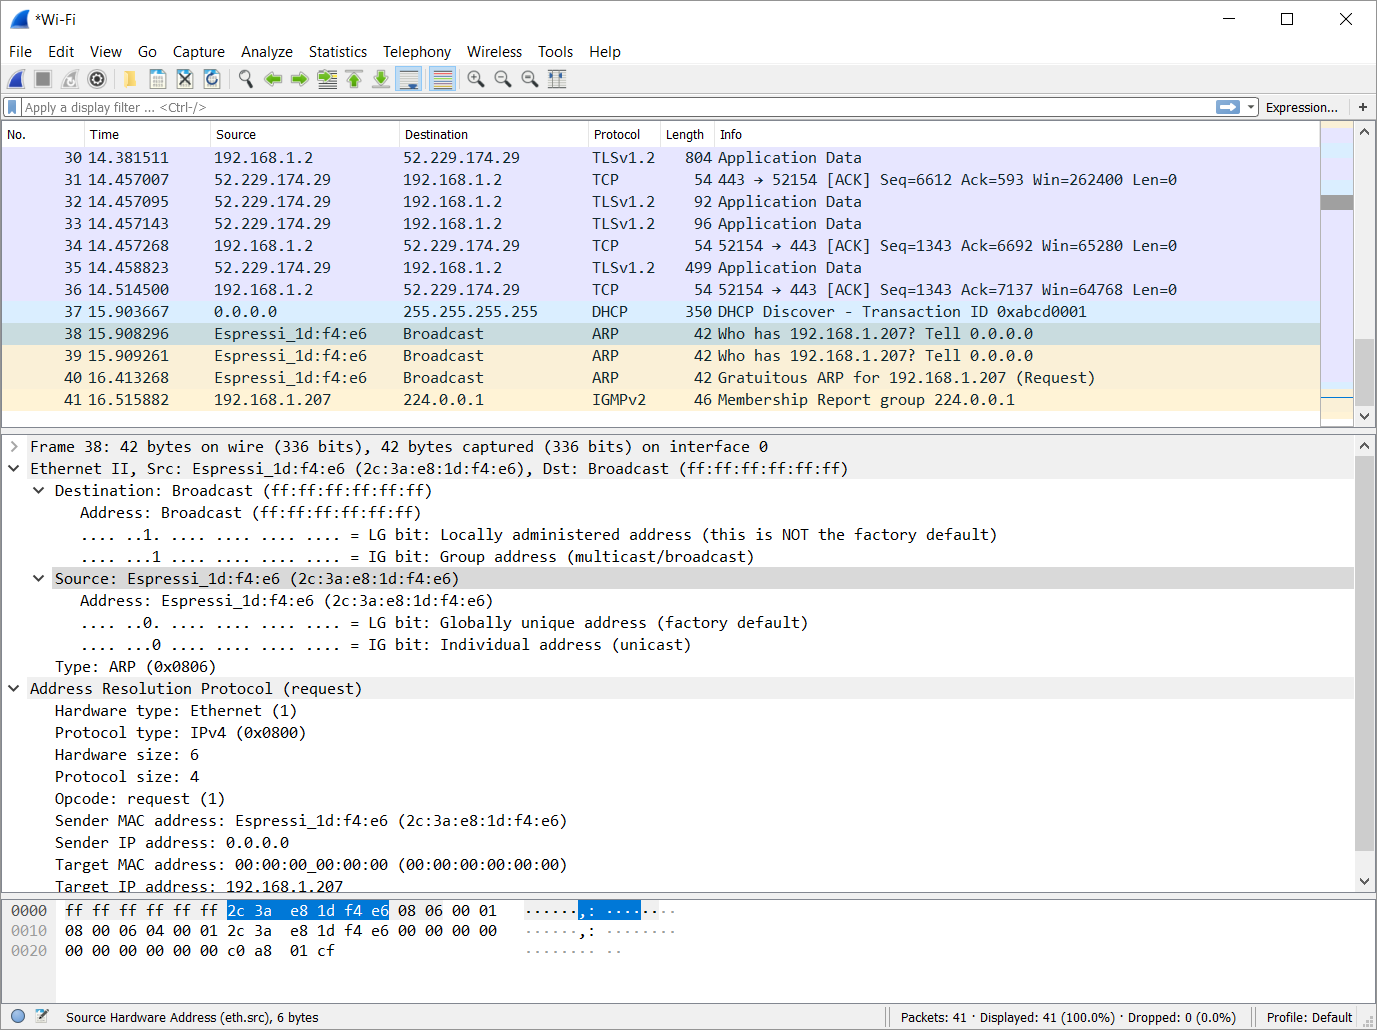
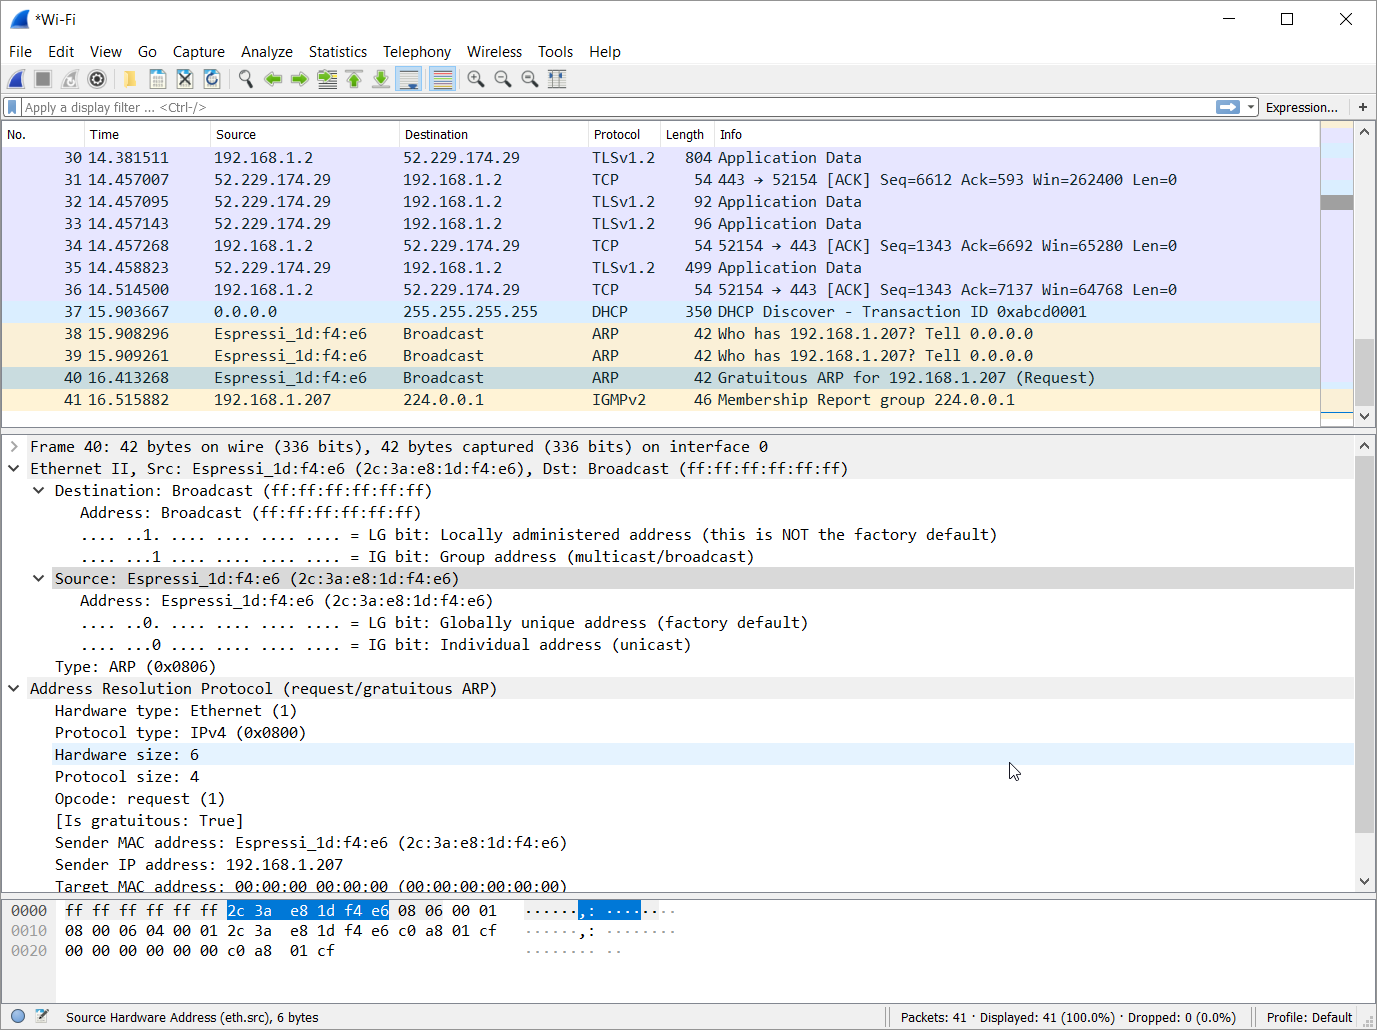
After this IGMPv2 (Internet Group Management Protocol) membership report. A membership report message is sent by a host whenever it joins a multicast group, and when responding to Membership Queries sent by an IGMP router.

How to use AT commands ?
- AT+command? to know the existing value e.g. AT+CWJAP?
- AT+command=val to set new value e.g. AT+CWJAP=ssid,password
- AT+command to execute a command if no parameter required e.g. AT+CWLAP
- Here CWLAP to get available local access points and CWJAP to connect to local access point and
How to configure ESP-01 as WiFi Server ?
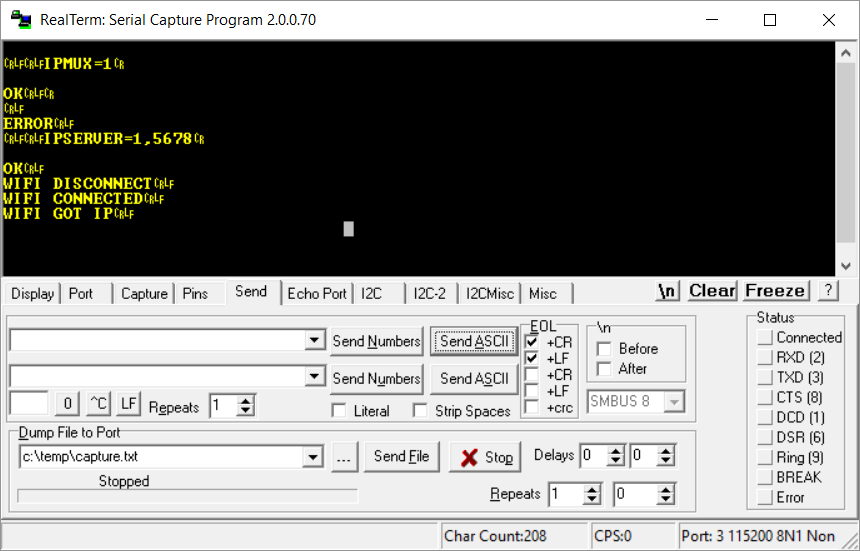
Step1: To configure ESP as a server first we must enable multiple connections to it using CIPMUX i.e. AT+CIPMUX=1
Step2: Then we should configure the server using command CIPSERVER i.e Configure as Server
AT+CIPSERVER=<par><port number>
- par=1 (open server)
- par=0 (close server)
e.g. : AT+CIPSERVER=1,5678
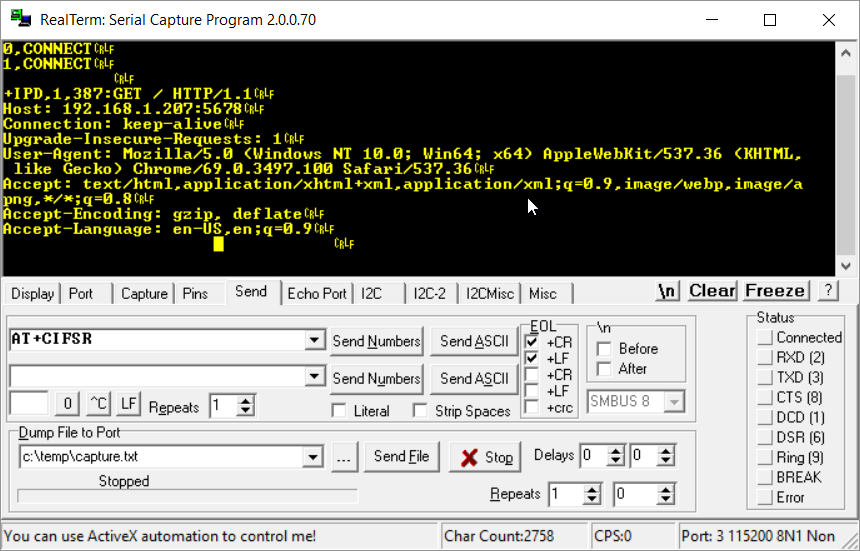
Step3: The IP address can be obtained by CIFSR i.e. AT+CIFSR.
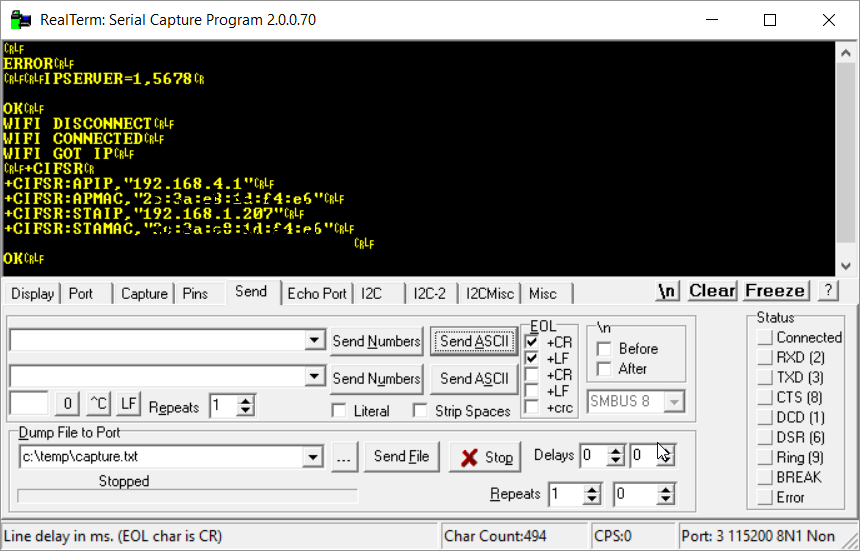
If two IP addresses are obtained this means CWMODE is set as 3. Here 192.168.4.1 is the default IP for the ESP8266 acting as access point (AP).
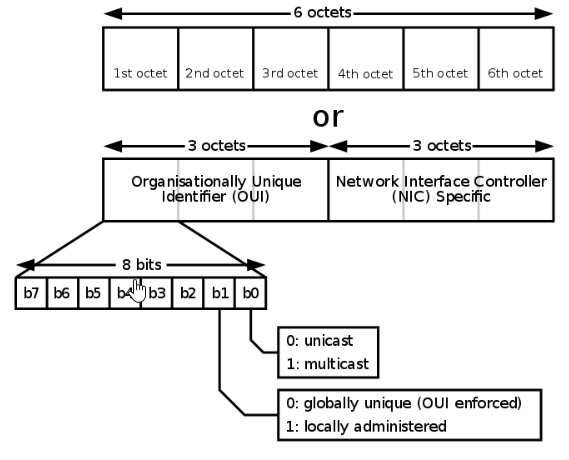
Take a note of MAC addresses (From Actual experiment Not in the above picture), I noticed only one bit b1 changed .
Step4: Now suppose if the STAIP is 192.168.1.207 as shown above, Check the connectivity using ping 192.168.1.207 from command prompt of Windows.
Step5: Open browser with http://ip:port i.e. http://192.168.1.207:5678 in this case. A message appears on the terminal window stating that the connection has been accepted.
Step6: Now to send data over the link use the command AT+CIPSEND=0,4. Here ‘4’ indicates the number of characters to be send. You will get a > sign . Type four characters blindly at this. After typing a message will be displayed saying SEND OK . These characters are received in the terminal window

We may use Wireshark tool to capture this .
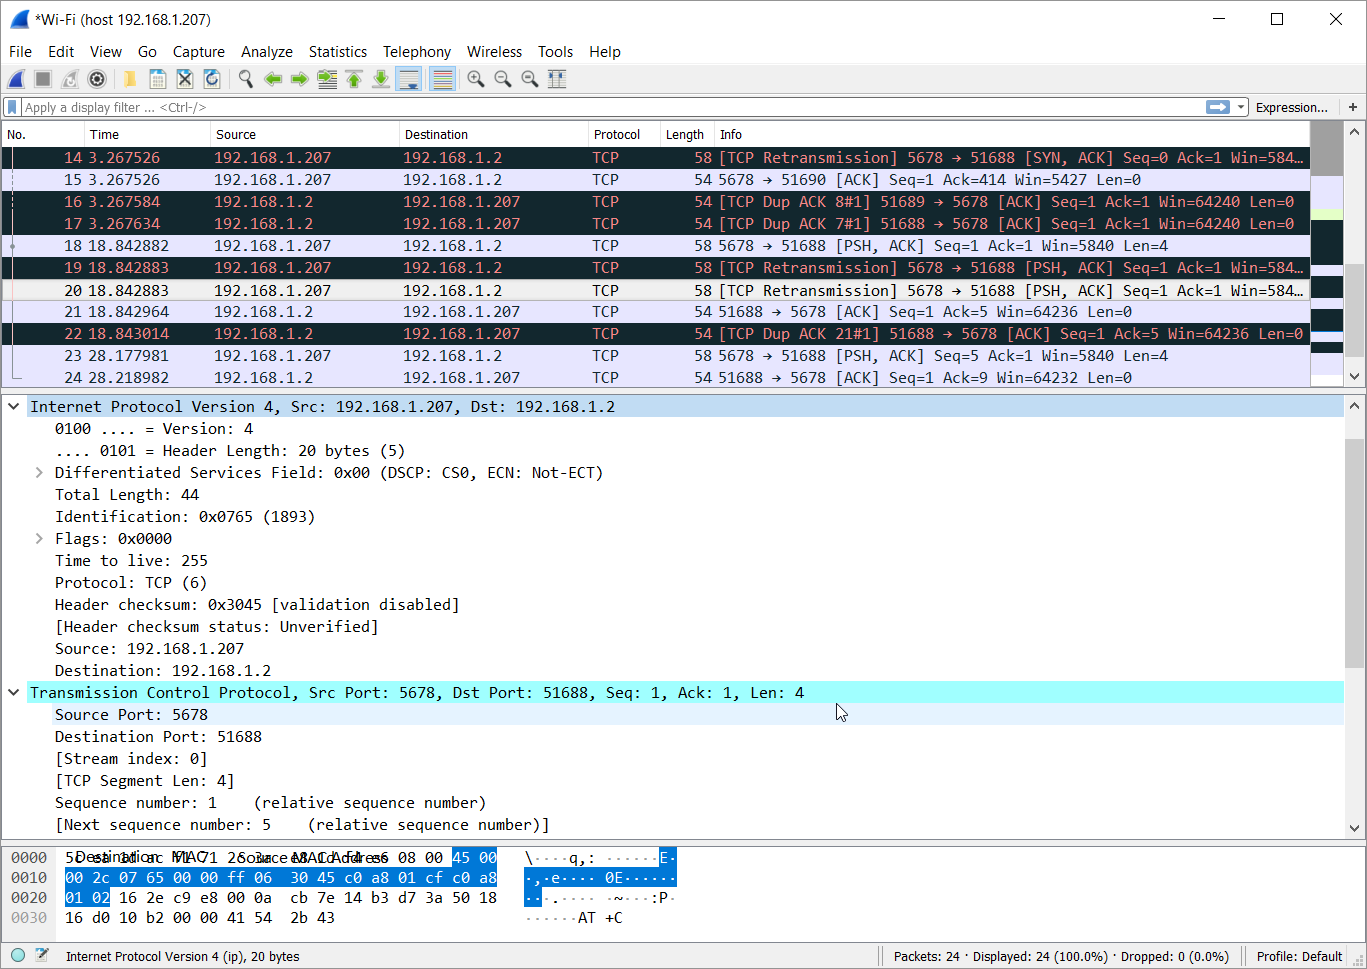
Here is the complete packet (Ethernet,IP,TCP)

Step7: In the end, to close the link between browser and ESP, the command AT+CIPCLOSE=0 should be used
Video
Are you curious about ESP8266 NodeMCU ? Lets look at NodeMCU with DHT11
References:
If you liked this article , Please support by sharing in your network.
Thanks for reading till end. Please provide your feedback regarding this article. Also subscribe Embedkari for other interesting topics.